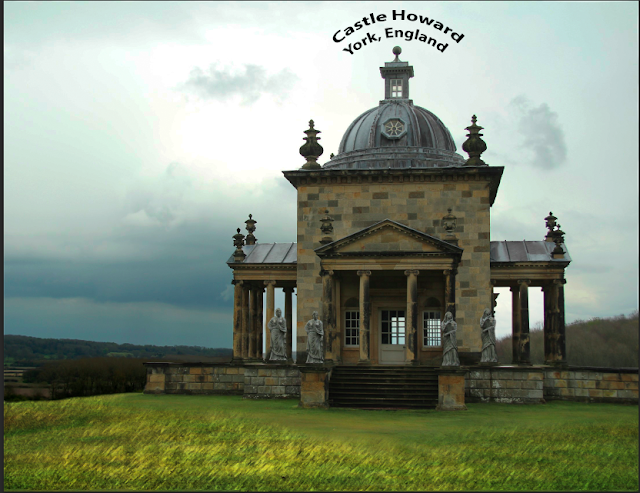
Finished Photo
Original Photo
After a lot of time experimenting with all of the different Photoshop tools, my project is finally finished.
I have incorporated all of the different tools that we were required to use for this project, along with a few others that I discovered along the way.
Clone Stamp
I loved using the clone stamp, and used it for a few different parts of my project. I used it first to add another statue to each side of the building, then to get rid of the middle statue design up towards the top of the building. I also used it to cover up the dark spots on the left and right side of the building. I did this by cloning other, cleaner, parts of the brick and going over the blackened parts with it. Finally, I used it to get rid of the small sign at the bottom of the steps, by cloning a different part of the step to place over it.
Brightness and Contrast and Levels and Curves
I adjusted the brightness, contrast, levels, and curves to make the sky darker and more of a vibrant blue than the original picture. I also used these to adjust the bush on the right side of the building in the background, and the trees on the left side, background of the building so that they would be darker and blend better with the sky.
Layer Styles Tools
I used the layer styles tools to add a drop shadow effect to the trees on the left side of the building in the background to enhance their look and help them to blend better.
Healing Brush
I got rid of the dots on the roof by going over them with the healing brush.
Paint Brush and Additional Adjustment Tools
While experimenting I discovered how to create a mask, so I added a fresco effect on the grass layer, then used the brush tool to mask the effect.
Text
Finally, I used text and added an effect to it to title my project. I chose this effect because I thought it fit nicely with how the roof of the building curved.


No comments:
Post a Comment